Permission required to use this feature: full access
With a subscriber preference center, your email recipients can change their own subscription details. This could mean updating their name or email address, any custom field information you have stored for them, or unsubscribing.
Note that when a subscriber unsubscribes through the preference center they will be unsubscribed from all lists, regardless of list-level unsubscribe settings.
Benefits of a preference center
A preference center makes it easy for subscribers to modify how you interact with them, instead of opting to unsubscribe. There are multiple reasons someone may want to unsubscribe:
- They don't want email on a particular topic.
- They have a new email address.
- They'd prefer less frequent emails.
- They're not sure what emails they signed up for.
When subscribers can change their preferences — for example, the frequency of emails or the topics they're emailed about — it increases the chances of keeping them on your list. It's also a great way to reduce the number of email addresses in your list that become inactive.
On average, 15–25% of all valid email addresses are discarded each year as people move to a different ISP, change jobs, or otherwise.
Customize subscriber preference centers
The look and feel of the preference center can be customized. Below is an image of a preference center that uses a custom header image.
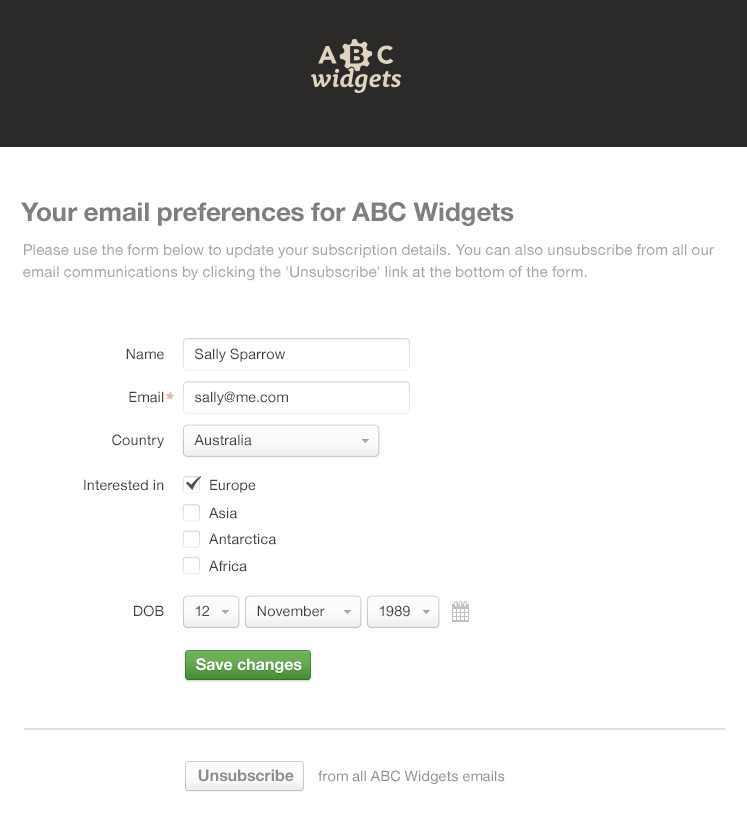
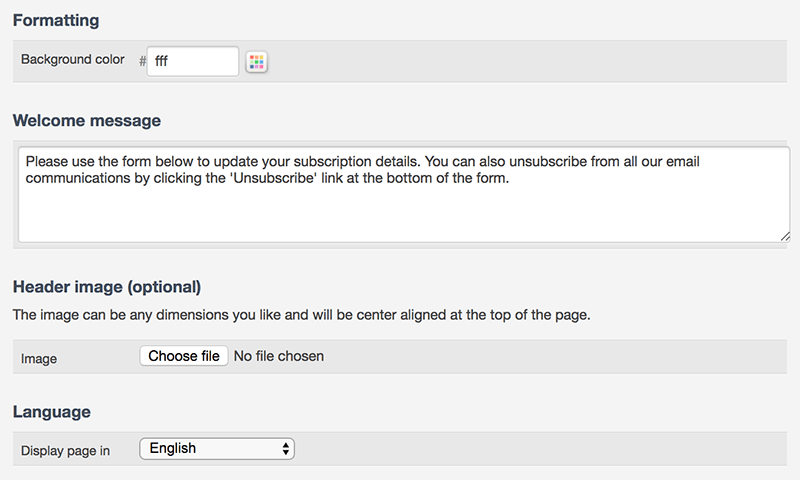
You can also format the background color, write a custom welcome message, and change the display language, as shown in the image below.
To customize your preference center:
- Click your profile image at the top right, then select Account settings
- Click Email Setup on the left
- Scroll down to Subscriber preference center, then click Edit
When you have made your customizations click Save changes. To view the changes, click Preview in the right sidebar.
Different preference centers for different subscriber lists
If you have multiple subscriber lists you will see a dropdown menu at the top of the preview page to toggle between preference centers for each list.

Your page customizations — for example, the header image and welcome message — will be used across-the-board, but the fields displayed are unique to each list.
Mobile number and SMS consent
If you have enabled SMS campaigns, you can display the Mobile number field and an SMS marketing consent checkbox on your form. See Collecting mobile numbers to grow your SMS subscribers.
Tracking permission and company policies
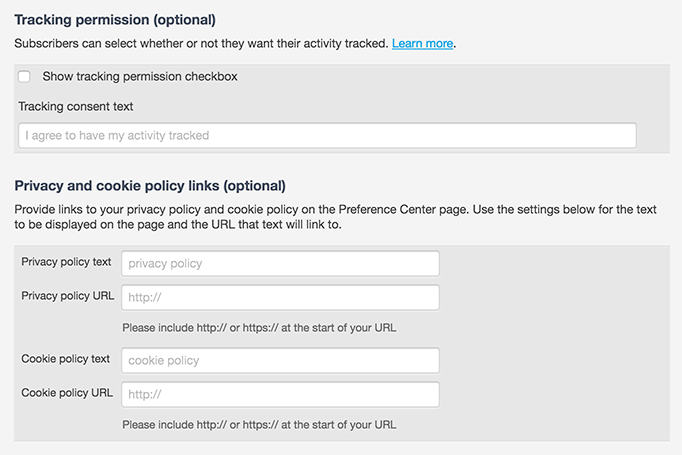
You can optionally show a subscriber's tracking permission settings on their preference center. This way, if a subscriber changes their mind on their tracking preference, they can change the setting themselves.
You can also link to your privacy and cookie policies, if you have them. If you complete the policy fields, you will see text at the bottom of the preference center in the following format:
See the [privacy policy text with URL] and the [cookie policy text with URL]
To turn on permission checkboxes, or include links to privacy and cookie policies, see the "Tracking permission" and "Privacy and cookie policy links" sections when customizing your preference center.
Set visible fields
You can set up a preference center with nothing more than an email address field for subscribers to update, or you might have multiple custom fields you want people to see and edit, depending on the list.
To control which fields are displayed and which are not:
- Click Lists & subscribers, then select the relevant subscriber list.
- Click Custom fields in the left menu.
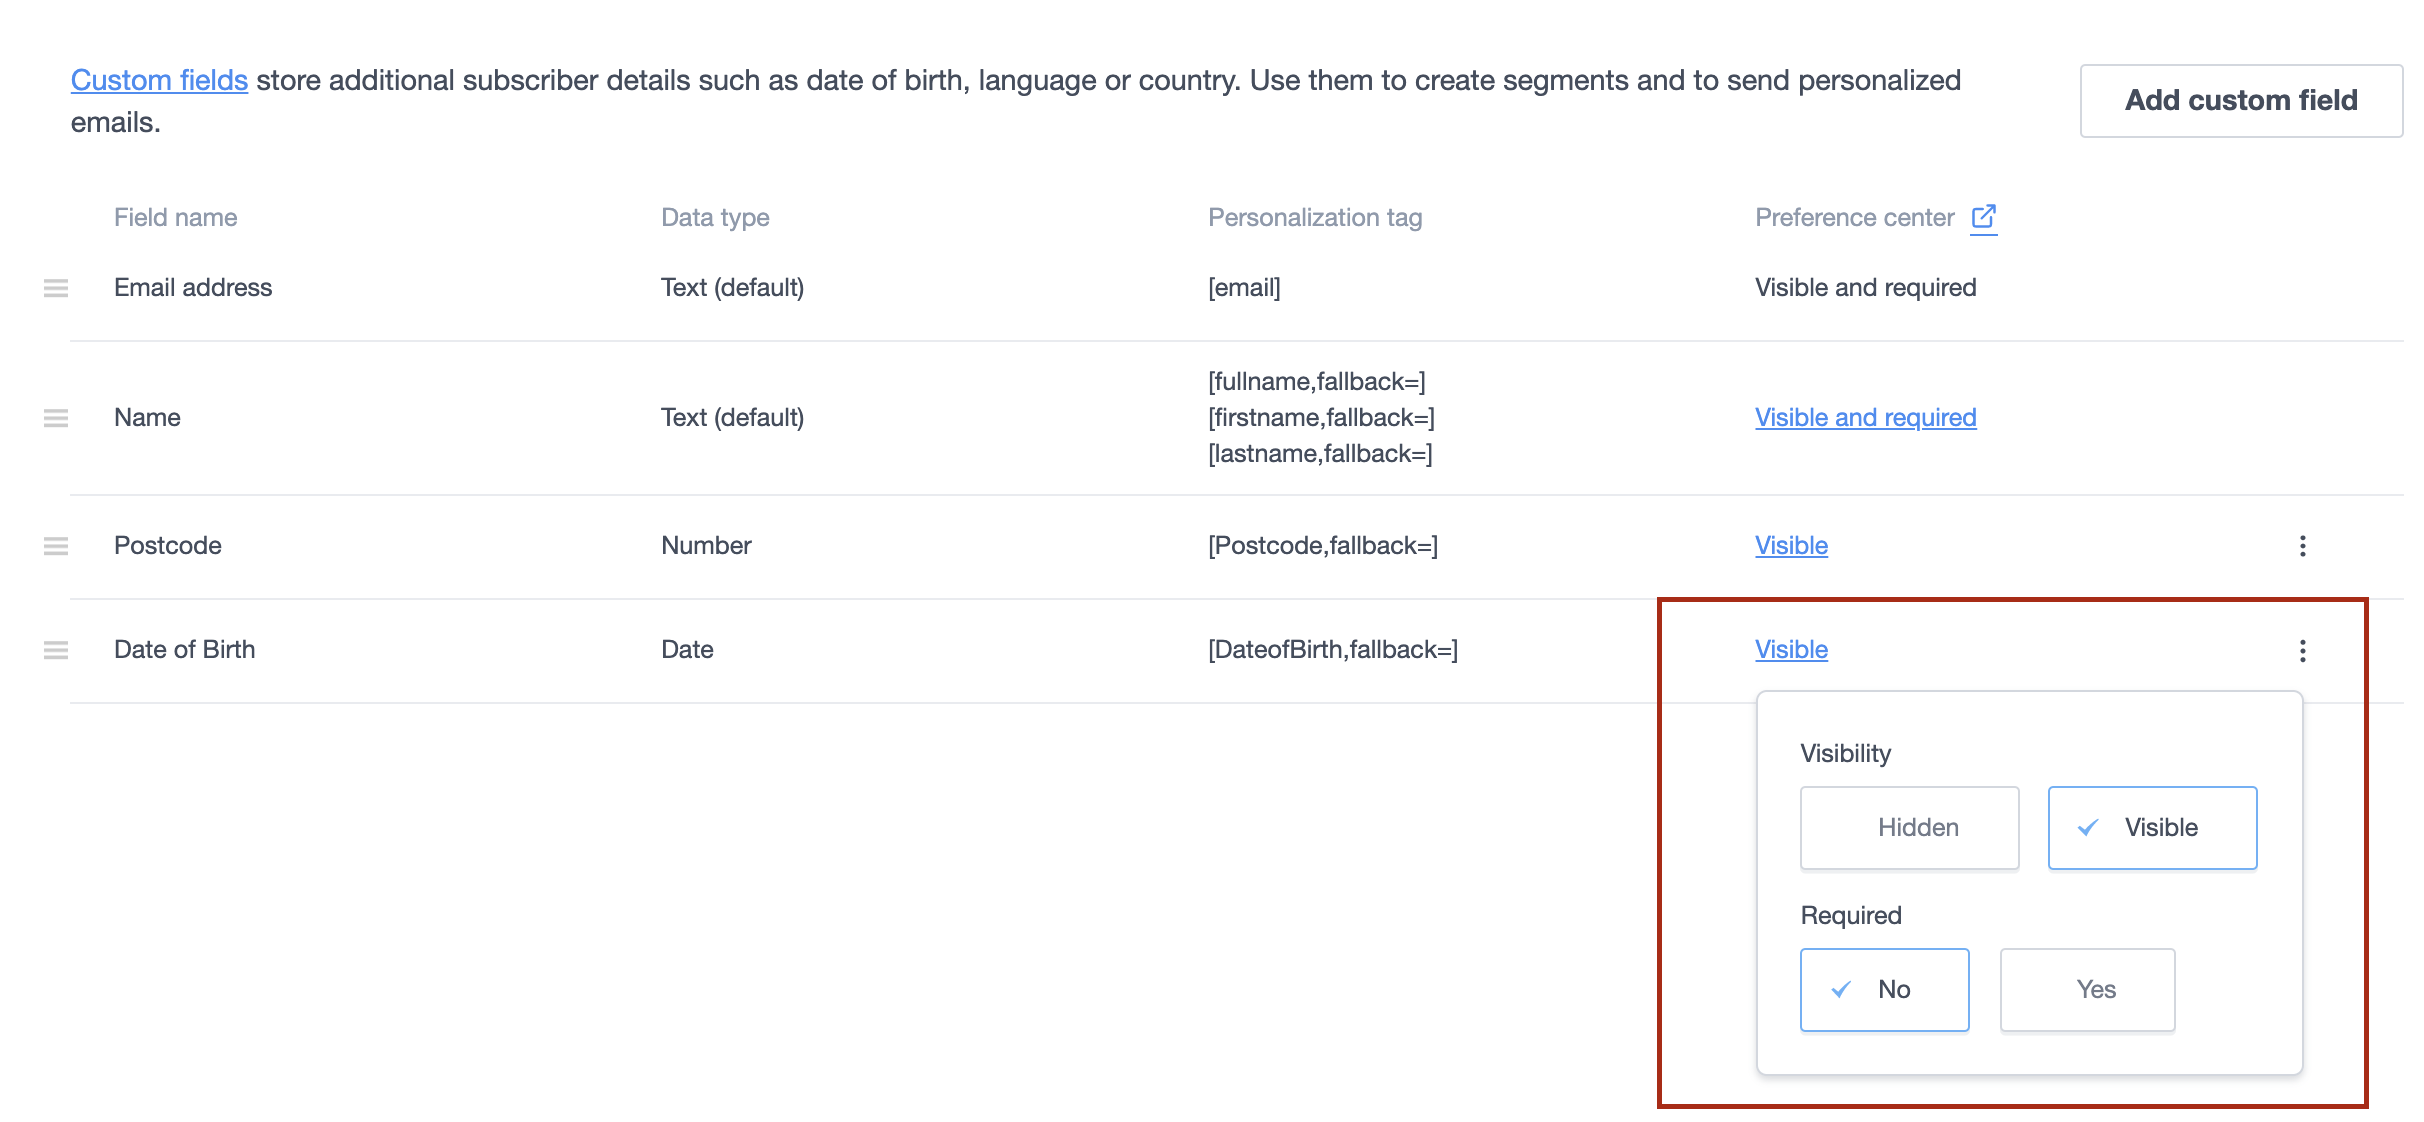
- At the top of each page you can create new custom fields. Each field can be set to Visible or Hidden.
- When you select Visible, an additional option will appear that allows you to select whether the field should be Required. Selecting this makes the field mandatory which means the subscriber will not be able to save their preferences until they have completed the field.
Change the display order of fields
You can also change the display order of fields by clicking the drag handle to the left of the table to move them up or down.
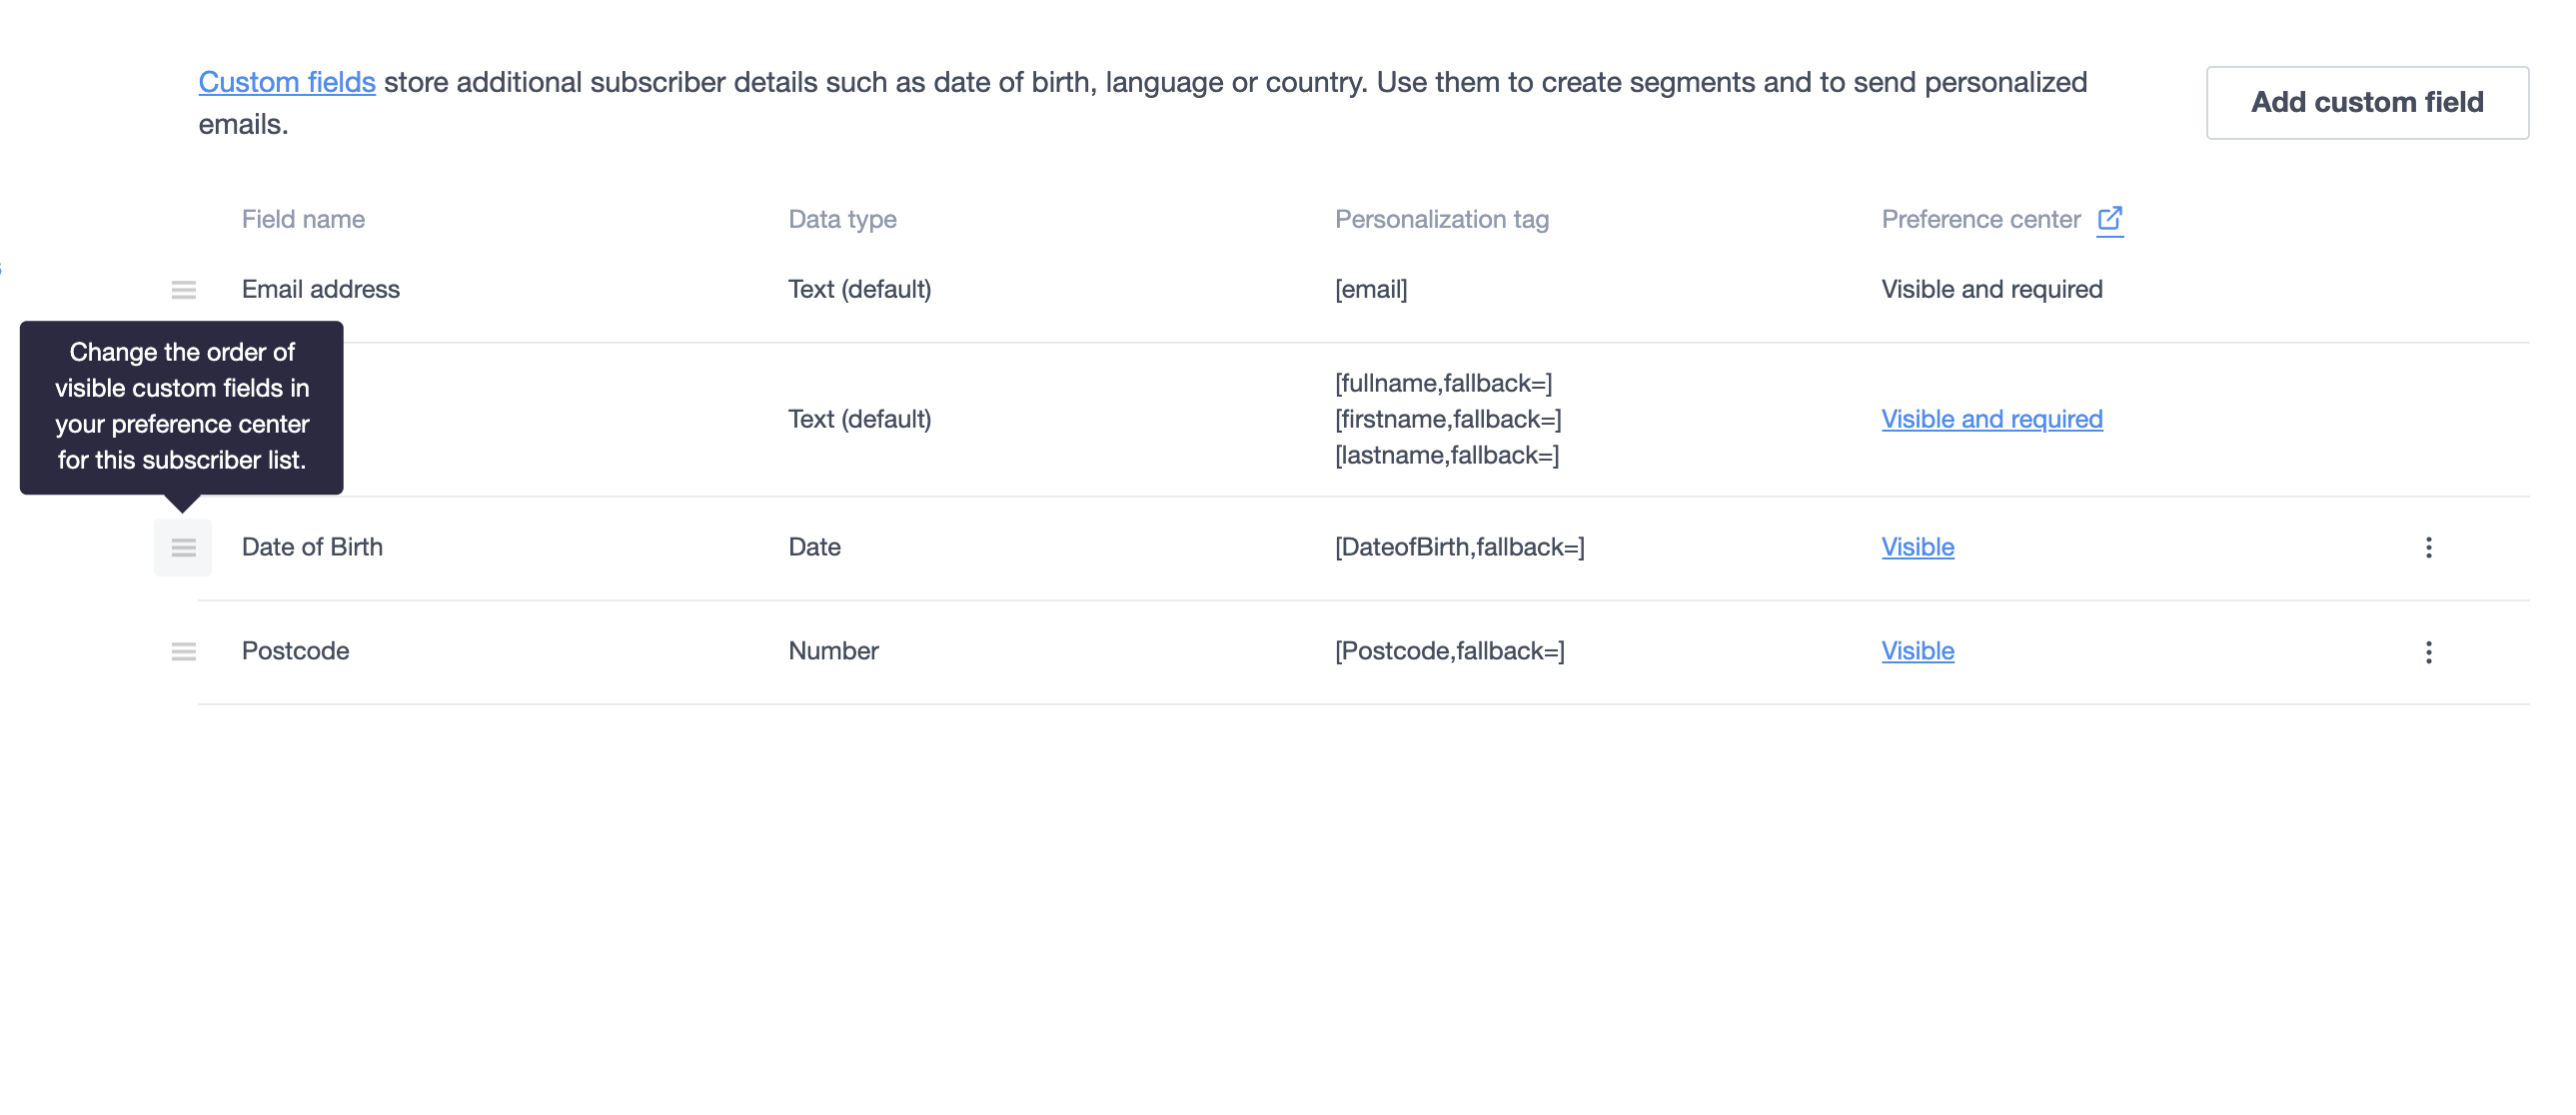
The order you put them in here is how they will be displayed on the subscriber preference form, which is instantly updated for you.
Add preference center links to emails
Below are instructions for adding the preference center link to campaign and journey emails.
Note that because each link is unique to the subscriber, we are unable to provide tracking or reports on who has clicked the link or whether details have been changed.
Email builder
Permission required to use this feature: create campaigns
When using the email builder, to turn on or off the preference center link:
- Click the footer of your email.
- In the left sidebar under "Footer settings", click Content.
- Select the Subscriber Preference Center checkbox to toggle the "Preferences" link at the bottom of your email.
You can add a link to the preference center in your email by using the [preferences] tag as the URL.
Custom coded emails
For custom coded emails or templates, the <preferences> element automatically generates a link to the preference center for each recipient.
You can customize the text for the preference center link by including text between the opening and closing elements. For example:
<preferences>Show me my preferences</preferences>
If you don't provide custom text, the text will be "update your preferences".
Plain text emails
To insert a link to the preference center in a plain text campaign, use the [preferences] tag.
Opening the preference center
When a subscriber clicks the preferences link in an email, they will be taken to a webpage where they can request to be emailed a secure link to their preference center. Once they receive this email, they can click the link within to go to their preference center and update their preferences.