Permission required to use this feature: transactional
With smart transactional emails you can use our email builder to design beautiful, on brand, responsive emails. You can even use existing email builder templates created for your marketing campaigns and tweak them to suit.
Like other emails sent with Campaign Monitor, smart transactional emails are hosted on our servers. This means you don't need to store the email or images yourself, potentially removing the need to deploy your website or application every time you want to update your emails.
Smart transactional email is triggered by our API, supports variables for personalization, and if you import your own HTML you can use the Liquid templating language as well.
Set up a smart transactional email
The first step in creating a smart transactional email is to set it up in our app:
- Click Transactional.
- Click Create an email in the right sidebar (if you haven't created a transactional email before, click Get started now instead).
- Follow the on-screen instructions to set up your email. The name you choose for your email will be used later for reporting.
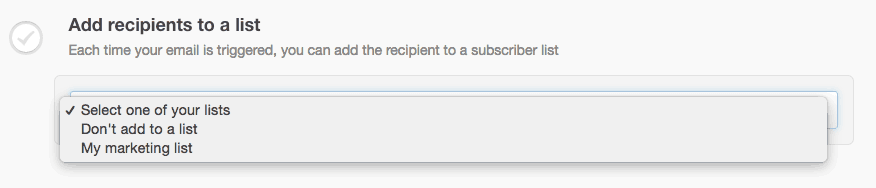
- If you have subscriber lists in your account, you'll also see the option to "Add recipients to a list". If you don't want to add your transactional recipients to a subscriber list, select Don't add to a list. Read more about this feature.
- When your email details are complete, click Build your email.
- On the next page, select from Recent emails, My templates or the "Choose a design" section to use the email builder to create your transactional email. Alternatively, if you want to use the Liquid templating language, select Import HTML.
- Design or import your email, making sure to include any smart transactional email variables or Liquid where required for personalization. After you have finished, you will be returned to the "Create Smart Email" page.
Add recipients to a subscriber list
When creating a smart transactional email, you can optionally add the transactional recipients to a subscriber list in your account. To comply with permissions-based email marketing, there are only two situations where doing this is acceptable:
- The recipient has explicitly expressed permission to be sent promotional emails by opting-in at the time of triggering the transactional email.
- The recipient has just completed a purchase from your website or application.
If a user triggers a different type of transactional email, such as a password reset, account confirmation or otherwise, they have not opted-in to a mailing list, and therefore cannot be added to that list as per our anti-spam policy.
Adding to a list must be confirmed with the API call
Choosing a list on the "Create smart email" page is only the first step in adding transactional recipients to a subscriber list, and is provided in our application for ease of use so you can easily change lists in the future.
In addition to selecting the list in our application, you or your developer will have to pass AddRecipientsToList as true in the API call when sending the smart transactional email.
If you add a smart transactional recipient's email address to a subscriber list, it will trigger "Subscriber joins a list" journeys.
Check your plain text version and test your email variables
If you're not sending solely in plain text, after you've designed or imported your email you should check the plain text version by clicking edit text version. Sometimes it's necessary to make formatting adjustments so it works well.
When you're done, click Send a test to test your email variables, or click Finish to view the code required to integrate the email with your website or application.
If you aren't already on a monthly plan, clicking Finish will prompt you to choose one.
Set up a trigger to send
With your email designed and ready to send, the next thing you'll see in our application is a message that reads "Ready to start triggering". If you're not the person adding email triggers to your application or website, this is where they take over.
Click View the code to see sample wrappers that will trigger the email to send, for the following languages/programs:
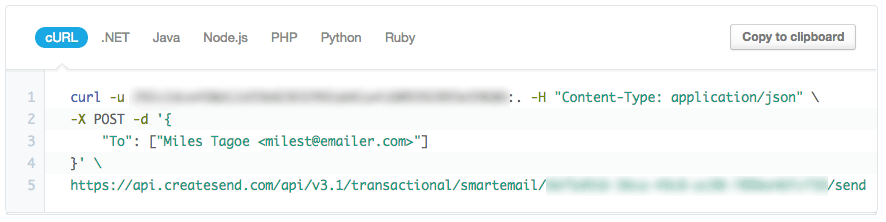
The wrappers include the required API endpoint, your API key, and the unique ID of the smart transactional email. As these are only samples, we recommend you code your own request, which will generally include a payload in JSON that contains who you're sending the email to, your email variables, and more. Refer to our API documentation for the complete list of methods and arguments that can be included in the payload for smart transactional emails.
After the code has been integrated into your website or application, it will start triggering emails on demand. When that happens, you'll begin to see reporting on the transactional landing page in your account.
Attachments
Attachments are specified in the Attachments array in the JSON payload. Individual attachments can then be stored as separate objects within that array:
{
  ...
  "Attachments": [
    {
      "Type": "application/pdf",
      "Name": "Invoice.pdf",
      "Content": "base64 encoded content here"
    }
  ]
}
Type — The MIME type for the file.Name — The filename that will be displayed to the recipient.Content — Stores the binary data for the file, which must be supplied as a base64-encoded string.
You can only attach PDF files to transactional emails, limited to 25MB in size.
View or edit existing smart transactional emails
To view or edit an existing smart transactional email:
- Click Transactional.
- Click the email name below "Emails".
- On the next page, click View and Edit in the right sidebar.
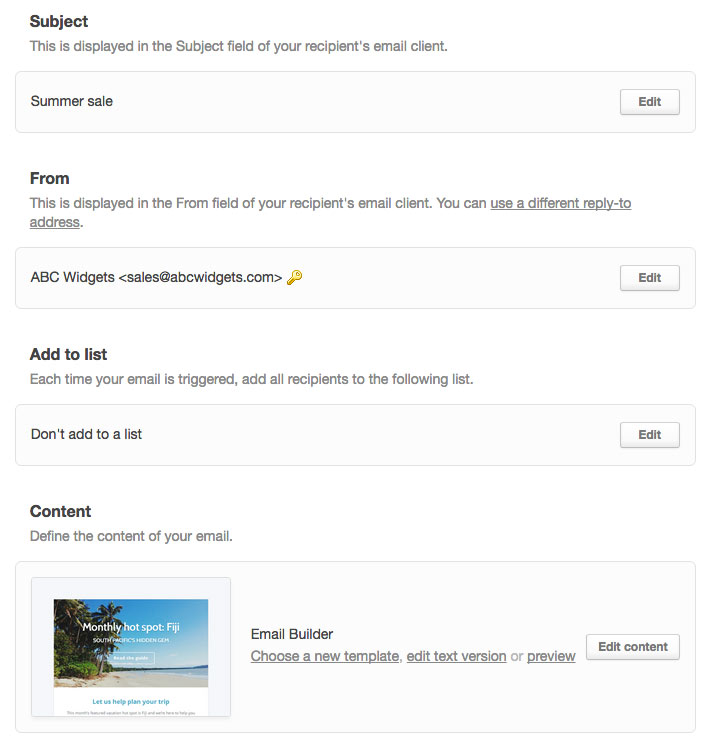
To update your email, click the Edit button for the section you want to change.
When you have completed your edits, click Publish changes, followed by Confirm changes. The updated version of your email will be sent the next time the email is triggered.
Any email updates that aren't published will show a "Pending changes" tag in the transactional section of your account.
Custom HTML template updates
When you update a custom HTML template that's used in a smart transactional email, the changes will be published immediately. If your changes go beyond simple style updates or text blocks with fixed content, this might not be ideal.
For significant template changes, instead of updating the existing template, import it as a new one. Then, from your smart transactional email's "View and edit" screen, click Choose a new template. You can then add new content, and choose when to publish your changes.