The final stage of creating an email campaign is scheduling it to send. There are multiple send options available, including sending at the best time for recipients, scheduling a future date and time, or sending immediately.
On the Prepare to send window, select Immediately to queue your campaign for immediate delivery. Other scheduling options are explained below, with some only available on specific billing plans. Start by selecting Schedule for later
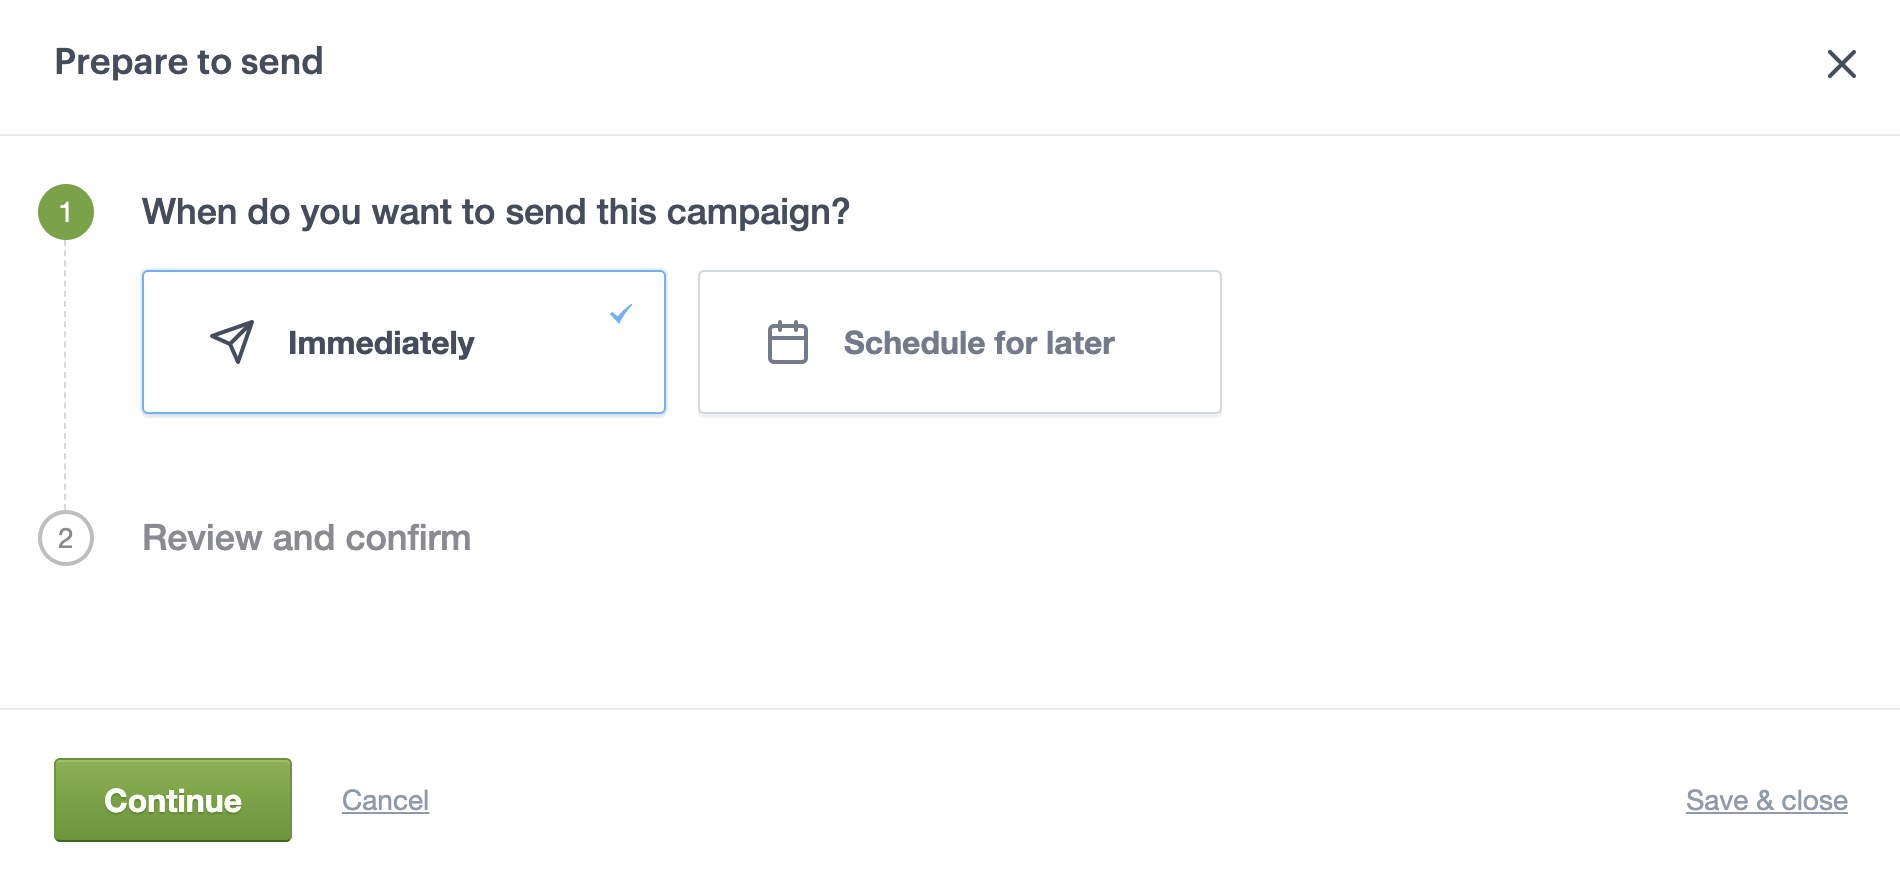
Check out our pre-send checklist before sending, because you can't stop or recall a sent campaign.
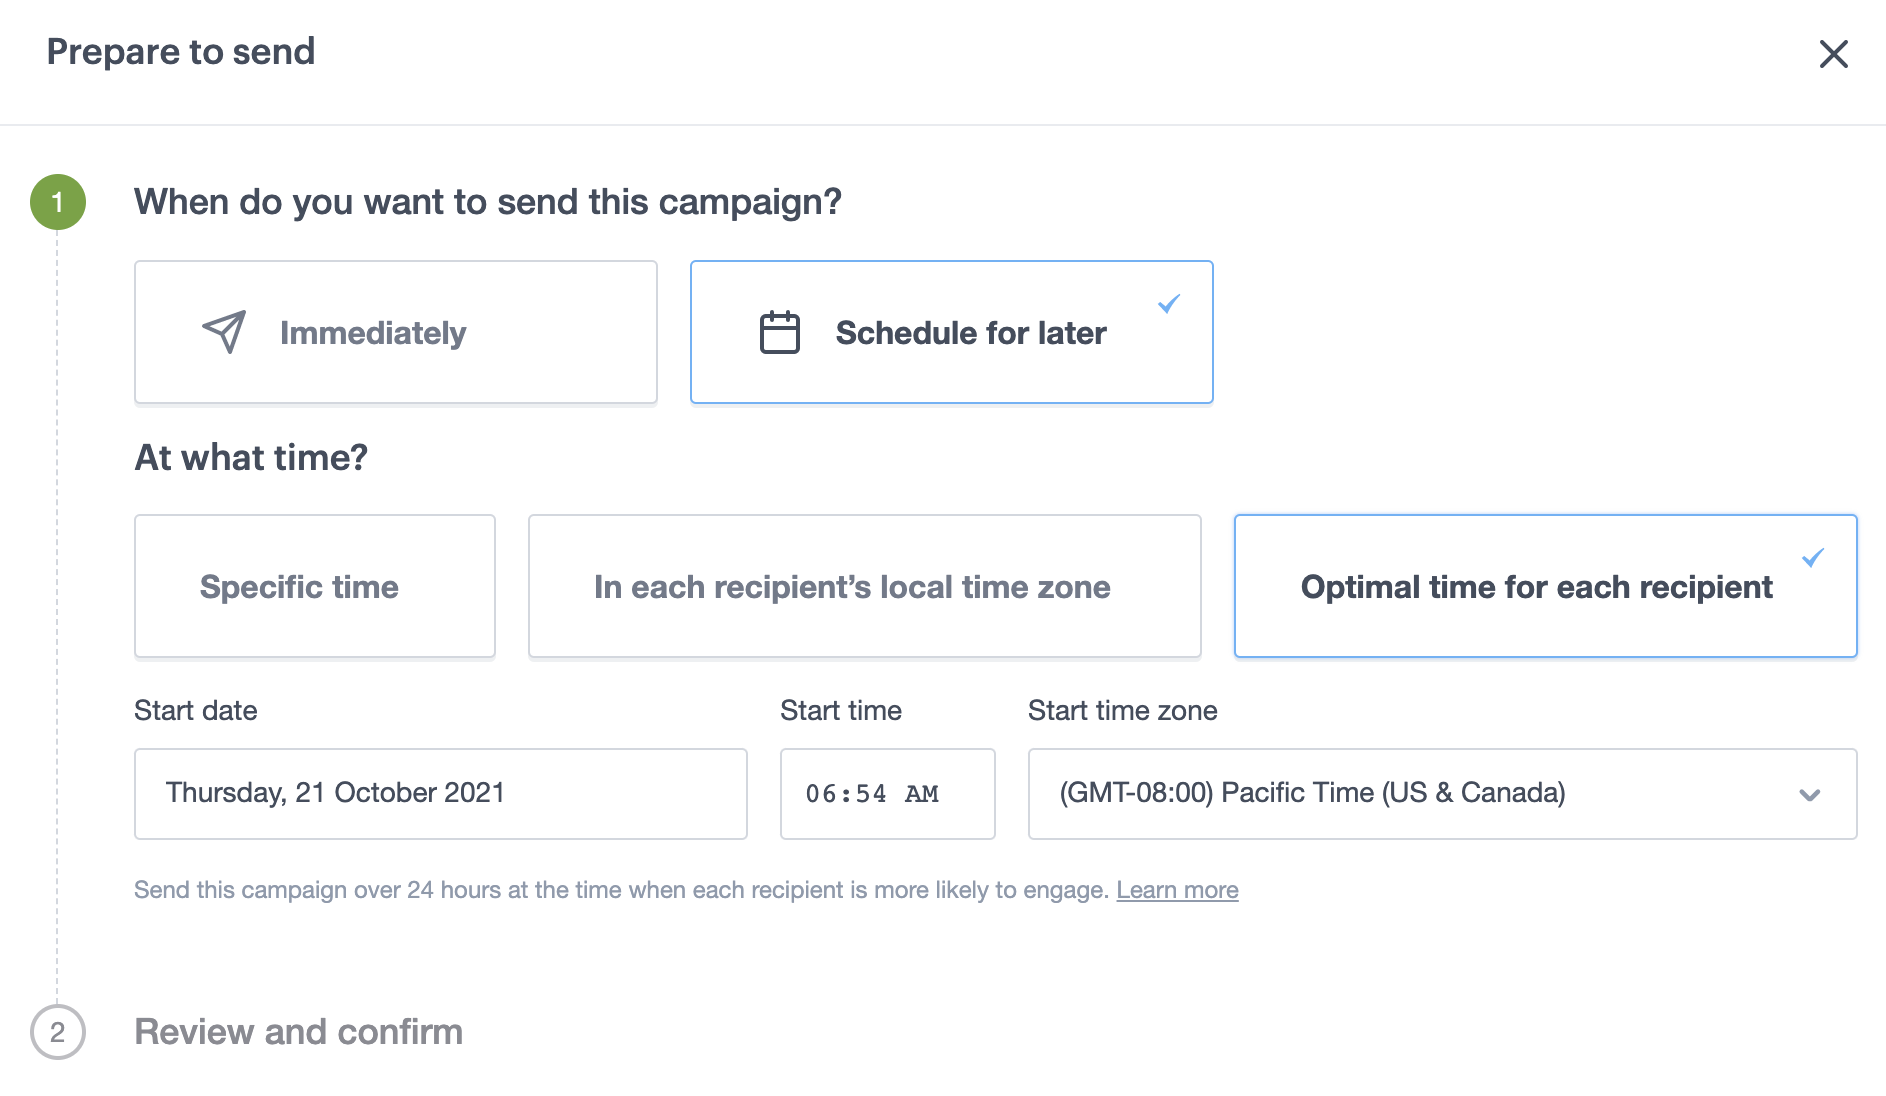
Optimal for each recipient
Available on the Premier monthly plan
Select Optimal time for each recipient to send your campaign when people are most likely to open it. This option takes the guesswork out of choosing the ideal send time because we calculate it for you based on things like a recipient's previous engagement and where they are located.
If you haven't sent to a recipient yet, or they haven't opened your emails, they will be sent the campaign at the start time you set.
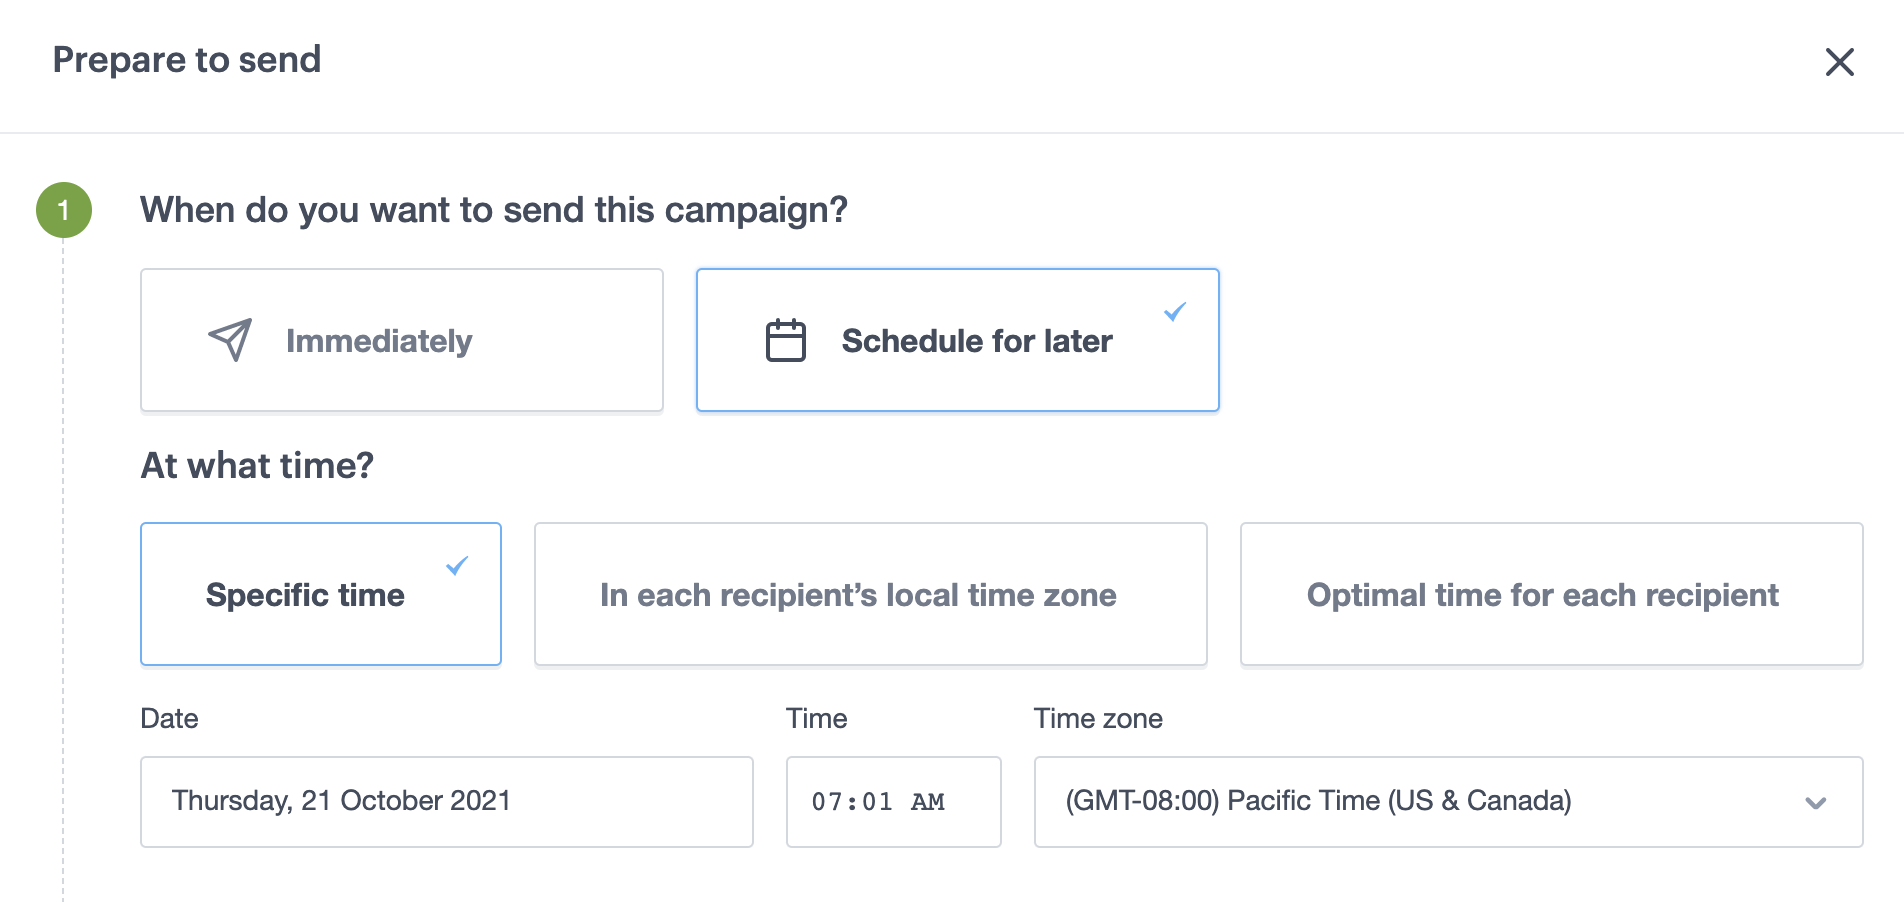
Specific time
Select Specific time to send at a time in the future, in a time zone of your choice. This is great for announcements and events.
Send in each recipient's local time zone
The Unlimited or Premier monthly plan is required to access this feature.
Select this option to send your campaign at the specified time in the recipient's time zone. For example, if you set the time to 9am, a recipient in Sydney will be sent the campaign at 9am in Sydney, while a recipient in San Francisco will be sent the campaign at 9am in San Francisco.
If the specified time has already passed for the recipient, we'll send the campaign to them immediately. If we don't know where they're located, they will be sent the campaign at the time in the time zone you have specified.
Tips for scheduling campaigns
There are extra things to consider when using optimized send time and scheduled campaigns.
Scheduled campaign recipients can change
If new subscribers sign up to the associated list (or lists) before the campaign has been sent, they will be sent the campaign.
The reverse is true for subscribers who unsubscribe, bounce, or are deleted from the associated list (or lists). If this happens before the campaign is sent, they will not be sent the campaign.
How billing works on pay per campaign
If you're on pay per campaign, you'll be charged when the email is sent, not on the day that you set the schedule.
This means what you are charged could differ from the amount shown when you set the schedule — either more if recipients are added, or less if they unsubscribe, bounce or are deleted. This ensures that everyone who is interested gets the email.
Reschedule, cancel, or edit a scheduled campaign
Except for campaigns scheduled to send In each recipient's local time zone, you can generally make changes or cancel up until a campaign is actually sent.
To make changes to a scheduled campaign:
- Click Campaigns
- Click the campaign name you want to change
To cancel a scheduled campaign:
- Click Campaigns
- Find the scheduled campaign you want to cancel, then click the three-dot menu to the right
- Choose Cancel schedule from the available options
Send in each recipient's local time zone
With In each recipient's local time zone selected, your last opportunity to change or cancel a campaign depends on what time zone your account has been set to.
To calculate when a local time zone send can be canceled, find out the time zone your account is set to, then subtract 14. For example:
- Sydney, Australia (UTC+10) — 14 - (+10) = 4 hours before the selected send time.
- San Francisco, USA (UTC-8) — 14 - (-8) = 22 hours before the selected send time.
- London, UK (UTC-0) — 14 - (0) = 14 hours before the selected send time.