Permission required to use this feature: Lists and subscribers > add new subscribers
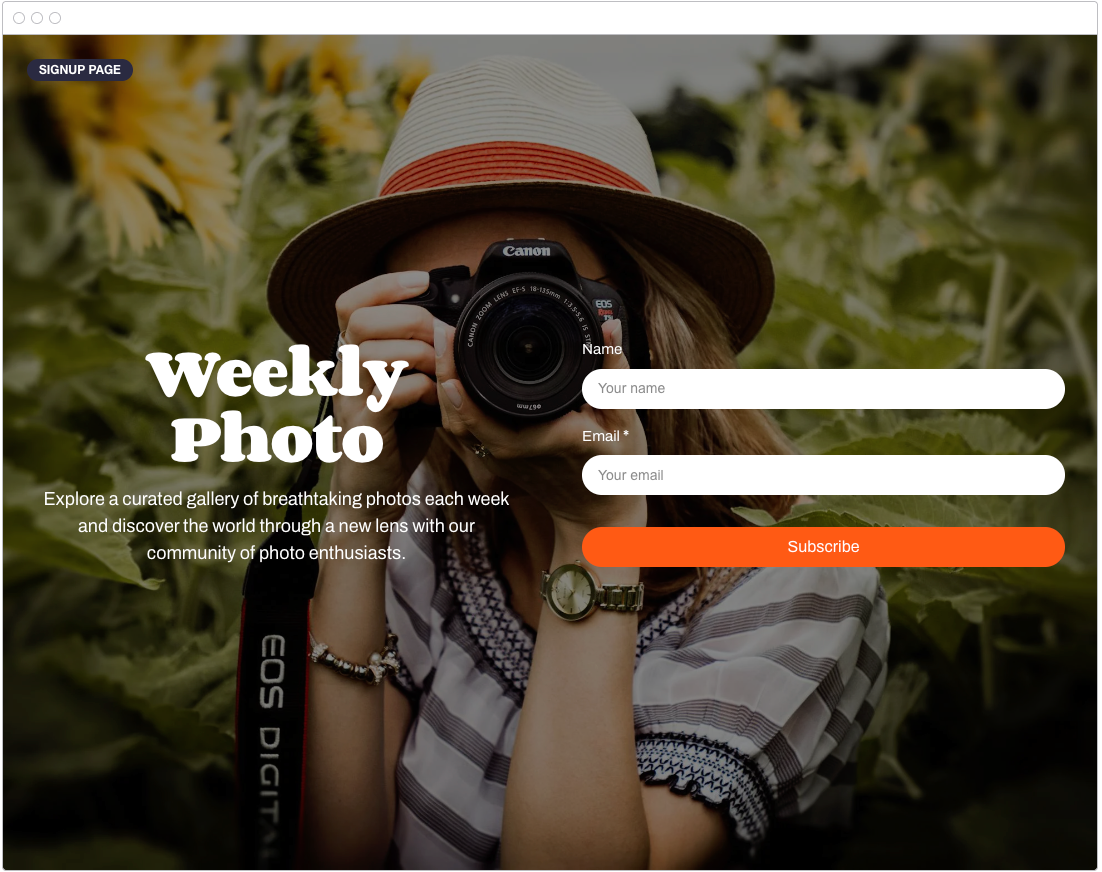
Every subscriber list includes a signup page—a standalone webpage with a unique URL, designed to help you reach your target audience. Quick to set up and simple to customize, with no coding required. Perfect for anyone who wants to start collecting signups right away or doesn’t have an existing site for a signup form.
How to create a signup page
You can create signup pages using two different methods, either via a list, or via the signup forms page.
Create a signup page via your subscriber list
- Click Lists & subscribers, then click on the relevant list name.
- Click Signup form builder in the left menu.
If your list already contains one or more signup forms, the most recently saved form will be loaded. To switch to editing your list’s signup page, click Select form type. In the dialog that appears, choose Signup page, then click Select.
Create a signup page via the signup forms page
- Click Lists & subscribers.
- Click Signup forms in the left menu.
- Click Create a signup form.
Choose a starting point for your signup page
When creating a signup page via the signup forms page you will be presented with the following options:
- Start from scratch – Begin with a traditional signup page design featuring minimal styling and customization.
- Use a template – Choose from predesigned themes that include placeholder text and images as a starting point.
Start from scratch
- In the ‘Select how to create your signup form’ dialog, select Start from scratch.
- On the ‘Create a signup form’ screen, select a list, click Signup page, and then click Continue.
If you see a banner on the ‘Create a signup form’ page informing you that the list already has one or more signup forms, you can either click Continue to proceed or select a different list to create your signup page before clicking Continue.
If you proceed after seeing the banner and a predesigned signup page loads, it means a signup page has already been saved for the selected list. Only one signup page can exist per list, so any changes you save will update the existing design.
If a different form type loads, click Select form type to switch to your list’s signup page.
Use a template
- In the ‘Select how to create your signup form’ dialog, select Use a template
- On the ‘Create a signup form’ screen, select a list, click Continue. Templates are currently only available for signup pages, so you won’t be able to select a different form type.
- On the ‘Select a template’ screen, click Select to choose a template.
If you see a banner on the ‘Create a signup form’ screen informing you that the list already has one or more signup forms, and you proceed, your existing signup page will be updated to use the selected template. Any custom text on your signup page will remain unchanged. If you have a header image, it will also remain unchanged unless the selected template includes its own header image, in which case your header image will be replaced.
If you don’t have an existing signup page saved but still see the banner, it means you have a pop-up or embedded form saved for the list. These form types will not be affected when you create a new signup page from a template.
Customize your signup page
Use the built-in tools to customize the design and layout of your form to match your branding, or switch between different template designs by clicking the overflow menu (3 dots) and selecting Change template. You can preview your form on the same page and toggle between desktop and mobile views. Data entered in the preview will not be saved or added to your list.
You can switch to editing your list’s other form types by clicking Select form type. Unsaved changes will not be lost when switching between form types. However, if you have made edits that you want to keep, you must return to your signup page and click Save before exiting the signup form builder.
Under this tab, customize the sign up form displayed to potential subscribers. Note that this tab will need to be selected to access the Fields and Options sections, which we'll cover later in this document.
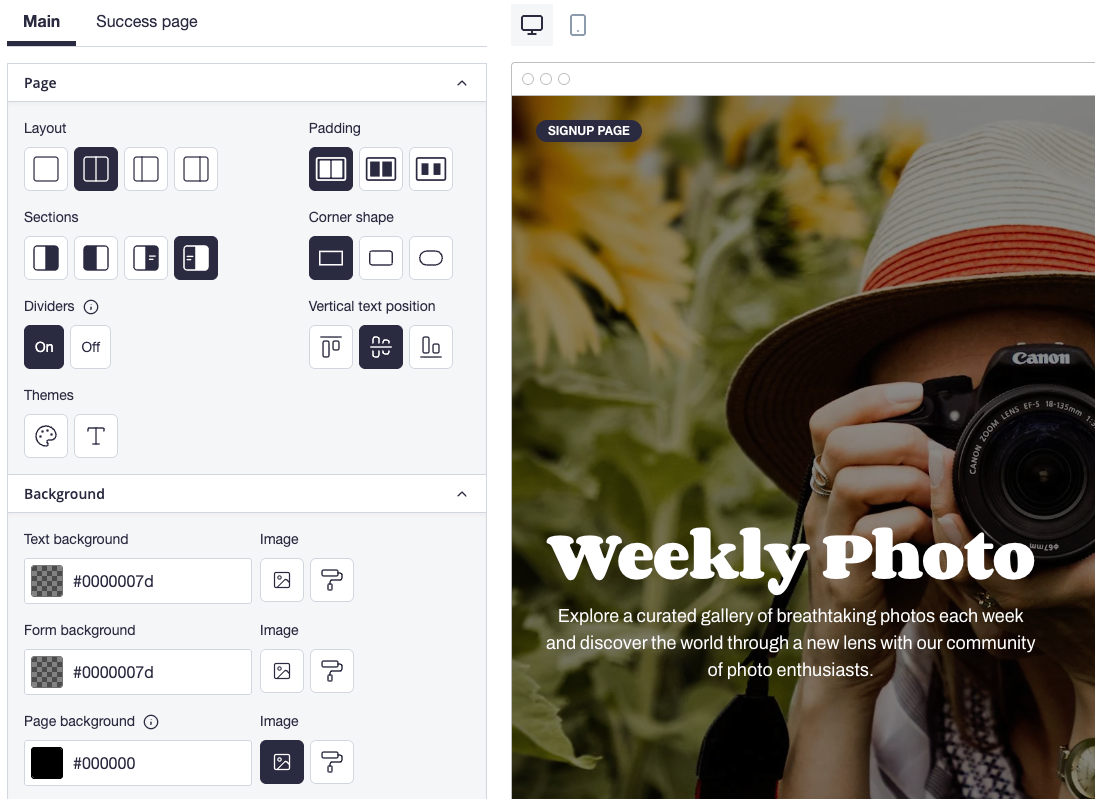
Page
Choose between a single layout, or split the layout into sections.
- For the single layout, you can display a box around your form content or not.
- For split layouts, you can customize how your form's content is displayed within the sections. Text and form elements can be grouped into the same section, or displayed in separate sections. When separated, you can adjust the vertical text position. Optionally add padding to sections, or adjust the corners of the sections.
- Choose whether to show or hide the dividers that appear when the Description or Permissions and policies section is visible.
- Apply color and font themes, which will automatically set defined color palettes and typography settings across all form components.
Background
Set the background color and transparency level for each section. You can optionally add a background gradient, or a background image by uploading a file or linking to an image URL (supported file types: .jpg, .jpeg, .png, .gif) and apply an effect to make overlaid content easier to read.
Form box
These options appear when you select a single layout that places a box around your form. You can customize the background color or apply an effect to blend the form with a background image. You can also adjust the width, corner style, border, and add a shadow.
Optionally upload a header image to appear above your form’s heading. Adjust the image size and alignment as needed.
Video
Embed a YouTube video. Accepts either a full URL or a video ID.
Heading
Customize the heading text by selecting a font family, font size, text color, alignment, and setting the maximum width. Fine‑tune the look by toggling uppercase, wrapping long words, adjusting line height and letter spacing, adding a decorative element, or applying a shadow.
Description
Add an optional description to your form and customize its font family, font size, text color, and alignment. Fine‑tune by toggling case, adjusting line height, or letter spacing.
Countdown
Add a timer that counts down to a selected date in your account’s time zone. The timer’s numbers use a standard monospaced font, so the only font property you can change is their color, which always matches the Description text color. The labels for Days, Hours, Minutes, and Seconds also use the Description text color and inherit the Description’s font family, weight, style, and size.
Label
Set the font family, font size, and text color for labels used in text fields, select menus, and checkboxes.
Field
Customize the background color, text color, corner style, and border of your form's text fields and select menus, and optionally add a shadow.
Personalize your button by setting the text, font family, and font size. Customize its background color, text color, corner style, width, border, and optionally add a shadow. If your form only has an email field visible, you can set the field layout to horizontal to place the button next to the email field.
Checkbox
For forms with multiple options (select many) custom fields, multiple list opt-ins, or permission options, customize the checkbox font family, font size, and text color.
Link
If your form includes policy links, you can adjust the font family, font size, and text color.
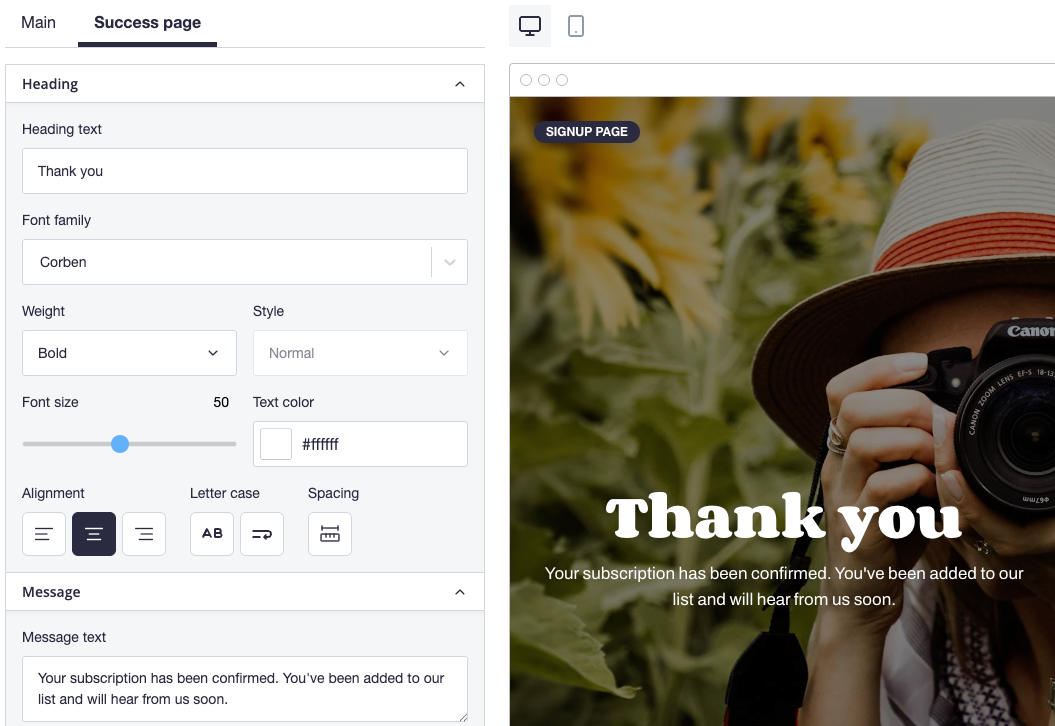
Success page
Under this tab, customize the message displayed to subscribers after form submission. Adjust the heading text, message text, and the font family, font size, text color, alignment, letter case, and spacing of each.
Fields
You can access this section while the 'Form' tab is selected.
If your subscriber list includes custom fields, they will appear below the default Name and Email fields. To add more custom fields, click Add new field.
Select the fields you want to include on your form, and check the Required box to make them mandatory. You can also reorder custom fields by using the drag handle on the left to move them up or down.
Options
You can access this section while the 'Form' tab is selected.
Opt in to multiple lists
You can add multiple lists to your signup page, allowing subscribers to opt into more than one list. If lists share custom fields with identical names and types, the data will automatically populate across all selected lists.
To avoid confusion, ensure that all included lists use the same opt-in type—either all confirmed opt-in or all single opt-in. For confirmed opt-in lists, subscribers will receive a single confirmation email covering all selected lists.
Permissions and policies
You can display checkboxes for email and tracking permissions and customize their labels, allowing subscribers to opt into email communications and tracking. This lets potential subscribers explicitly choose whether they want to receive emails and allow tracking of email opens and clicks.
Additionally, you can include links to your privacy policy and cookie policy.
Language
Changing the language setting updates default field labels Name and Email, as well as error messages.
However, all other content must be updated manually:
- Custom field labels – If the field names are in English, they will appear in English on your form. To edit custom fields, go to your subscriber list page and click Custom fields in the left sidebar.
- Editable text – Any default text in editable fields, such as the heading, description, and labels for permissions and policies checkboxes or links, will not automatically update to your selected language. Be sure to manually update this text in the signup form builder to match your chosen language.
- Verification email content – This applies to confirmed opt-in lists. The verification email sent to subscribers is in English by default. To edit this email, open your subscriber list page, click Settings in the left sidebar, then under Subscribe options, click Edit next to Confirmed opt-in email.
Mobile number and SMS consent
If SMS campaigns are enabled, you can add a Mobile Number field and an SMS Marketing Consent checkbox. See Collecting mobile numbers to grow your SMS subscribers for more details.
Reset all styles
To remove all custom styles—including those you’ve added yourself or inherited from a template—click the overflow menu (three dots) and select Reset all styles. Your header image, heading text, and description will not be affected.
Save and share your signup page
Once you’ve finished customizing your signup page, click Save. In the dialog that appears, you can click the link to your form or use the Copy link button to share it. You can also scan the QR code to access your form, or click Download QR code to save it for easy offline sharing.
Subscribers who use this link or QR code will be added directly to your list.
Further changes you make will not appear on the signup page until you save again. If you want to get the link or QR code for your signup page without saving changes, click the overflow menu (three dots) and select Share.
Reporting for signup pages
We track the number of subscribers and visitors each signup page receives and calculate a conversion rate to help you assess performance. You can view reporting data for each signup page by clicking the View report button of the signup page builder.
Some useful things to know about reporting:
- Visitor tracking on signup pages is based on the user's internet browser, with no expiration period. Repeat visits from the same person using the same browser, regardless of elapsed time, or after a browser update, register as the same visitor rather than a new one. A new visitor appears only if the user accesses the page via a different browser or private browsing mode.
- If a visitor submits multiple subscriptions to the same form using different email addresses, the visit count increments accordingly with each submission. This behavior can occur when the form is accessed on a shared device, such as a tablet or kiosk at an event, or when testing a signup page.
- When using the ‘Opt-in to multiple lists’ feature, a signup page's total subscribers will include those added to both the primary list and any additional lists selected by the subscriber. If a subscriber joins multiple lists simultaneously, the visitor count adjusts to match the total number of list additions. This ensures the conversion rate remains accurate.
Signup form builder update
We've enhanced our signup form builder with new layout and flexibility features. As a result, signup pages created with the previous version must be converted to an updated template format.
If you see an update message when opening an existing signup page, follow these steps:
- Review the form preview carefully
- Ensure all elements appear as intended
- Make any necessary adjustments
- Save your design
Taking a moment to verify your signup page’s appearance will ensure a smooth transition to the new format and maintain an effective signup process for your subscribers.